Amazon Aurora - Global Database
Failover at Aurora Global Database
When used in combination with replicas located at the same region, an Aurora Database Cluster (not global) can perform an automatic failover inside that region. If you are using the Aurora Global Database cluster, you can also perform a manual failover to your secondary region. When combined with an application layer implementation across multiple regions (via immutable infrastructure or ( copying your AMIs to the secondary region, for example), you will be able to meet your RPO, RTO and SLA in the unlikely scenario of an entire region becoming unavailable.
Let’s work now with an example on how these failover capabilities can be implemented on your environment. To demonstrate this, we will work with two main tasks:
- Simulating a failure on your Primary Region
- Promoting the Secondary Aurora Database Cluster to Primary
Before proceeding with these tasks, please make sure that the following prerequisites are already in place:
-
You have a working Session Manager Workstation configured Connect to the Session Manager Workstation
-
You already have an Aurora Global Database Cluster created and working as expected.
1. Simulating a failure on your the Primary Region
If you’re not already connected to the Session Manager Workstation, connect to it following these instructions on your Primary Region. Once connected, enter the following commands, replacing the placeholders with the Outputs from the CloudFormation stack built at the beginning of this lab.
sudo yum install -y jq
export DBUSER=`aws secretsmanager get-secret-value --secret-id [secretArn] | jq --raw-output '.SecretString' | jq -r .username`
export DBPASS=`aws secretsmanager get-secret-value --secret-id [secretArn] | jq --raw-output '.SecretString' | jq -r .password`
mysql -h [clusterEndpoint] -u$DBUSER -p"$DBPASS" mylab
Because you can have multiple browser tabs open, make sure you’re always operating in the desired region.
Where can I find the cluster endpoint (or any other parameter)?
Because you’re working with a Aurora Global Database, there are several endpoints in the primary and secondary regions that you’ll have to keep track of. Check the end of the lab [Deploy a Global Database] for instructions on how to find the cluster connection addresses.
Once connected to the database, use the code below to create a table. Run the following SQL queries:
DROP TABLE IF EXISTS failovertest1;
CREATE TABLE failovertest1 (
  pk INT NOT NULL AUTO_INCREMENT,
  gen_number INT NOT NULL,
  some_text VARCHAR(100),
  input_dt DATETIME,
  PRIMARY KEY (pk)
);
INSERT INTO failovertest1 (gen_number, some_text, input_dt)
VALUES (100,"region-1-input",now());
COMMIT;
SELECT * FROM failovertest1;
Take note of the query results, you’ll use them later to compare.
Do not close your MySQL command line connection to the Aurora database.
You can simulate a region failure using multiple engines. However, in this case, you will simulate a long-term, large-scale (albeit infrequent) failure, and the best way to do this is to stop all input/outbound network traffic (incoming and outgoing) to the Aurora Global Database Primary Database Cluster node.
Your lab environment contains a VPC Network ACL (NACL) with a DENY ALL rule which will block all inbound and outbound traffic from the subnetst tha are assigned to it. This will emulate a network flaw that will make the Primary Region Database Cluster unavailable to your applications.
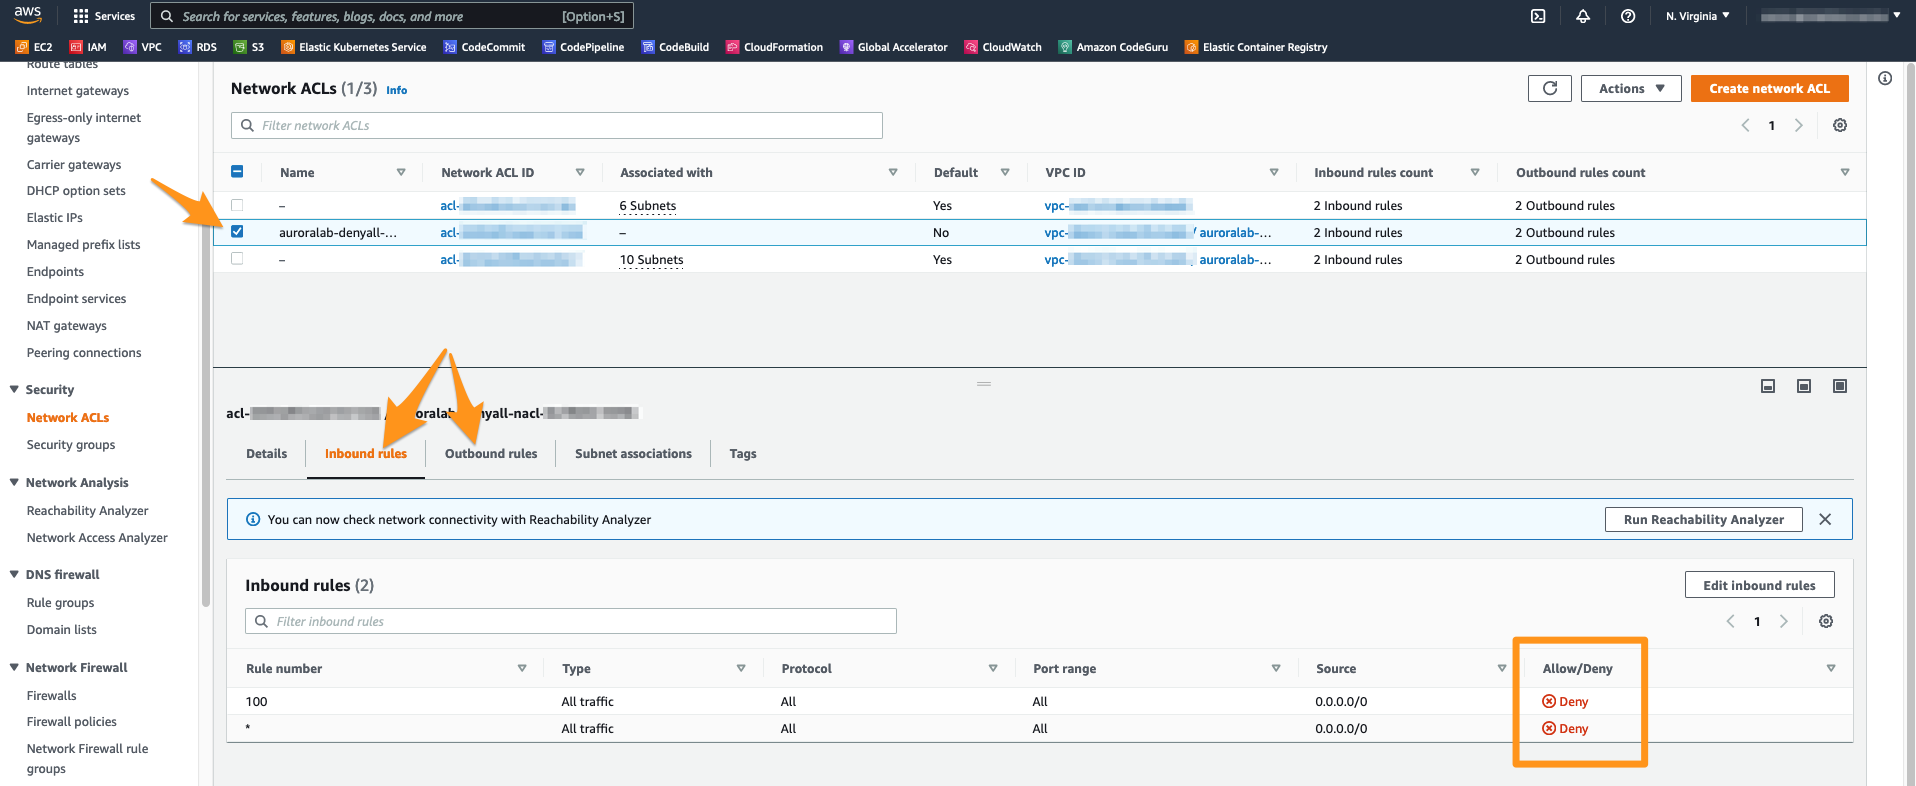
To perform this network failure simulation, please open the VPC service console in the Primary Region and then navigate to the Network ACLs section. You should see a NACL called auroralab-denyall-nacl. Notice however that this ACL is currently not associated to any of your VPC Subnets. Review it by checking the box next it’s name and check the Inbound Rules and Outbound Rules tabs at the detail panel at the bottom. You should see that these rules are defined as DENY for ALL traffic.
Make sure you’re still working in the Primary Region, especially if you’re following the links above to open the service console.
Switch now to the Subnet associations tab in the details pane and click on Edit subnet associations.
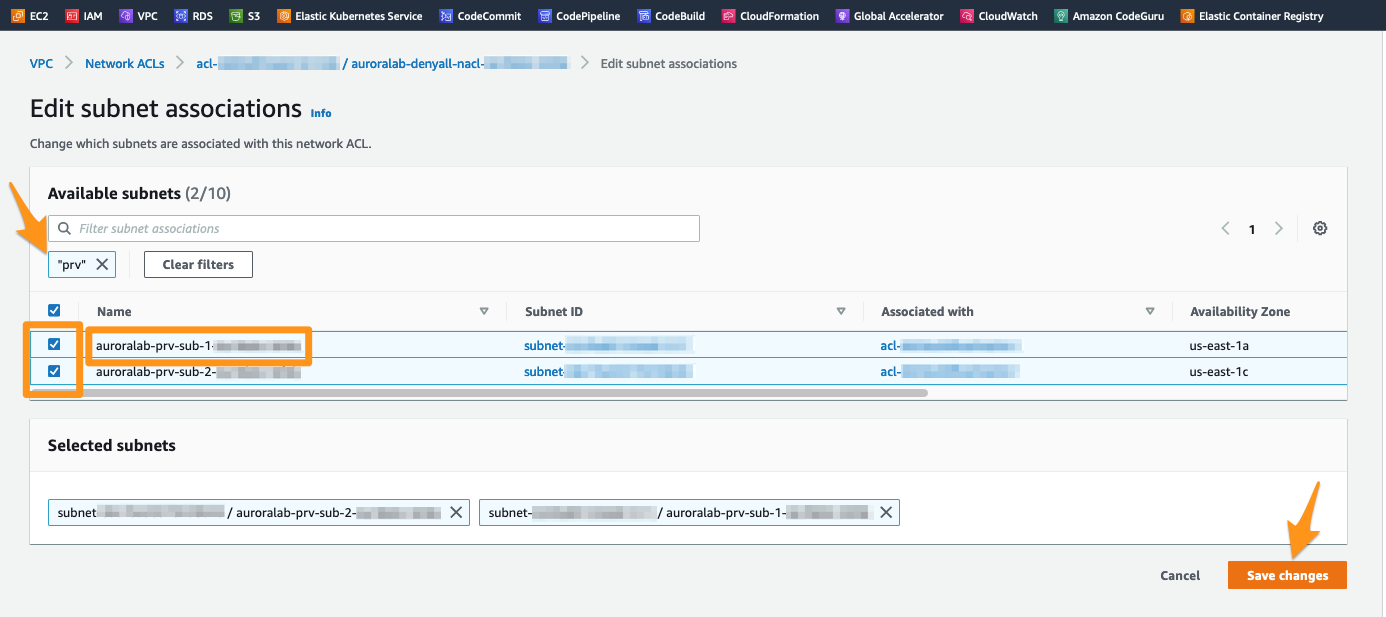
The Aurora Database Cluster is configured to use private subnets that were configured for your lab environment. These subnets are named with the auroralab-prv-sub- prefix, followed by a number corresponding to the Availability Zone in which they are placed. You may need to enlarge the column Subnet ID to see their full name.
To proceed, select all subnets that start with this prefix auroralab-prv-sub-. You can also simply use the search box to filter on any subnet with the name prv and select them. Click the Save changes button to confirm the association of the NACLs to these Subnets.
Once configured, these NACL rules will take effect immediately and will make the resources within private subnets inaccessible from the network perspective. Validate your Primary Database Cluster is now inaccessible by entering the following command at the MySQL client command line. You will recieve no response and the command will eventually time out.
SHOW STATUS;
Your MySQL client connection to the database on the Session Manager Command Line should eventually be interrupted with an error message indicating that the client has lost connection to the server.
2. Promoting the Secondary Database Cluster to Primary
In a real world scenario, you would need to address the failover of your applications and other infrastructure elements (such as EC2, Fargate containers, etc) alongside with the Database Failover. Since this is an exercise that is limited the Database aspect of a Disaster Recovery event, we will not be covering all these steps..
Let’s now open the Amazon RDS console at the MySQL Database Cluster details page at the Secondary Database Cluster.
Make sure you’re working in the Secondary Region, especially if you’re following the links above to open the console.
Why does the status of my Primary Database Cluster and my Database instance still appears as Available ?
You may have noticed that on your RDS console id still showing the Primary Region Database Cluster and the Database Instance as Available. Since we are just simulating a disaster event by leveraging NACLs to block all network traffic, this failure simulation is running at the network scope (your VPC and the cluster subnets) only. Therefore, the RDS Aurora Service itself is still running as expected and the internal health checks are still reporting as healthy since there is no actual database failure at the moment.
With the Secondary Cluster auroralab-mysql-secondary selected, click the menu Actions and select Remove from global database.
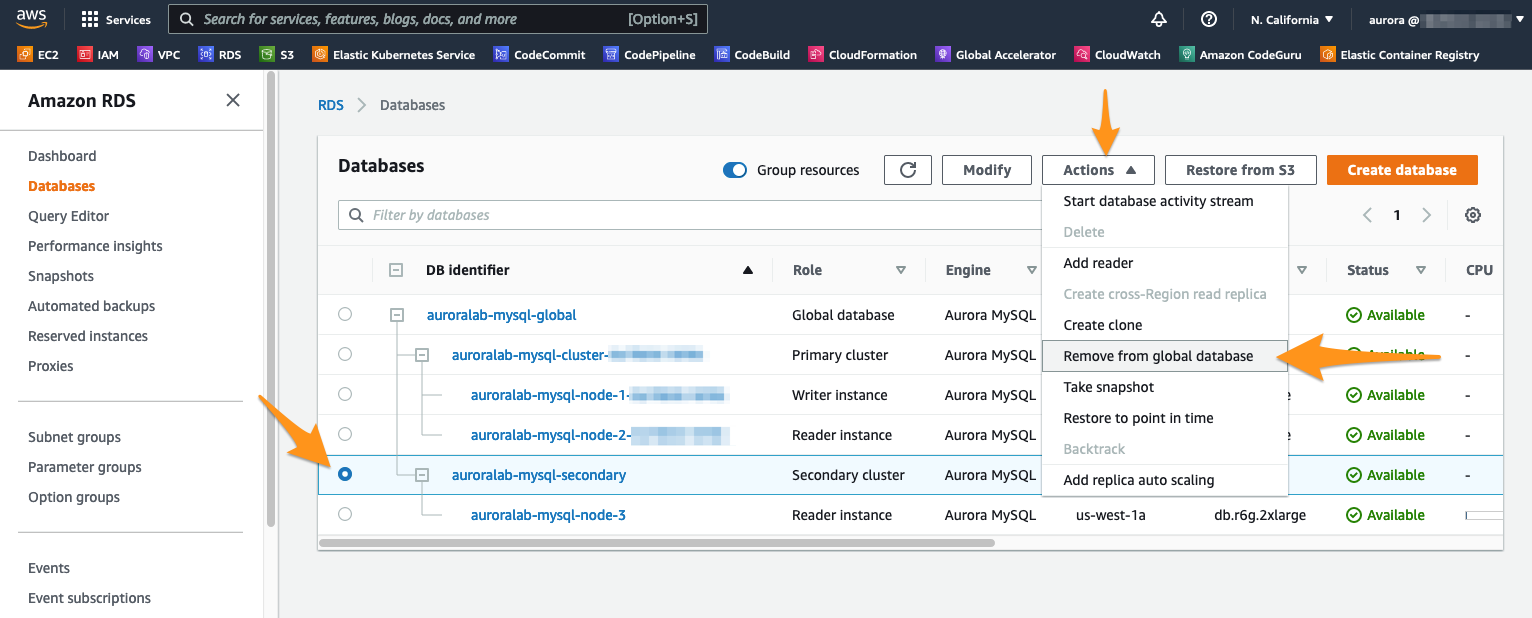
A message will appear prompting you to confirm. This action will stop replication of the Primary Cluster. Confirm by clicking Remove and promote.

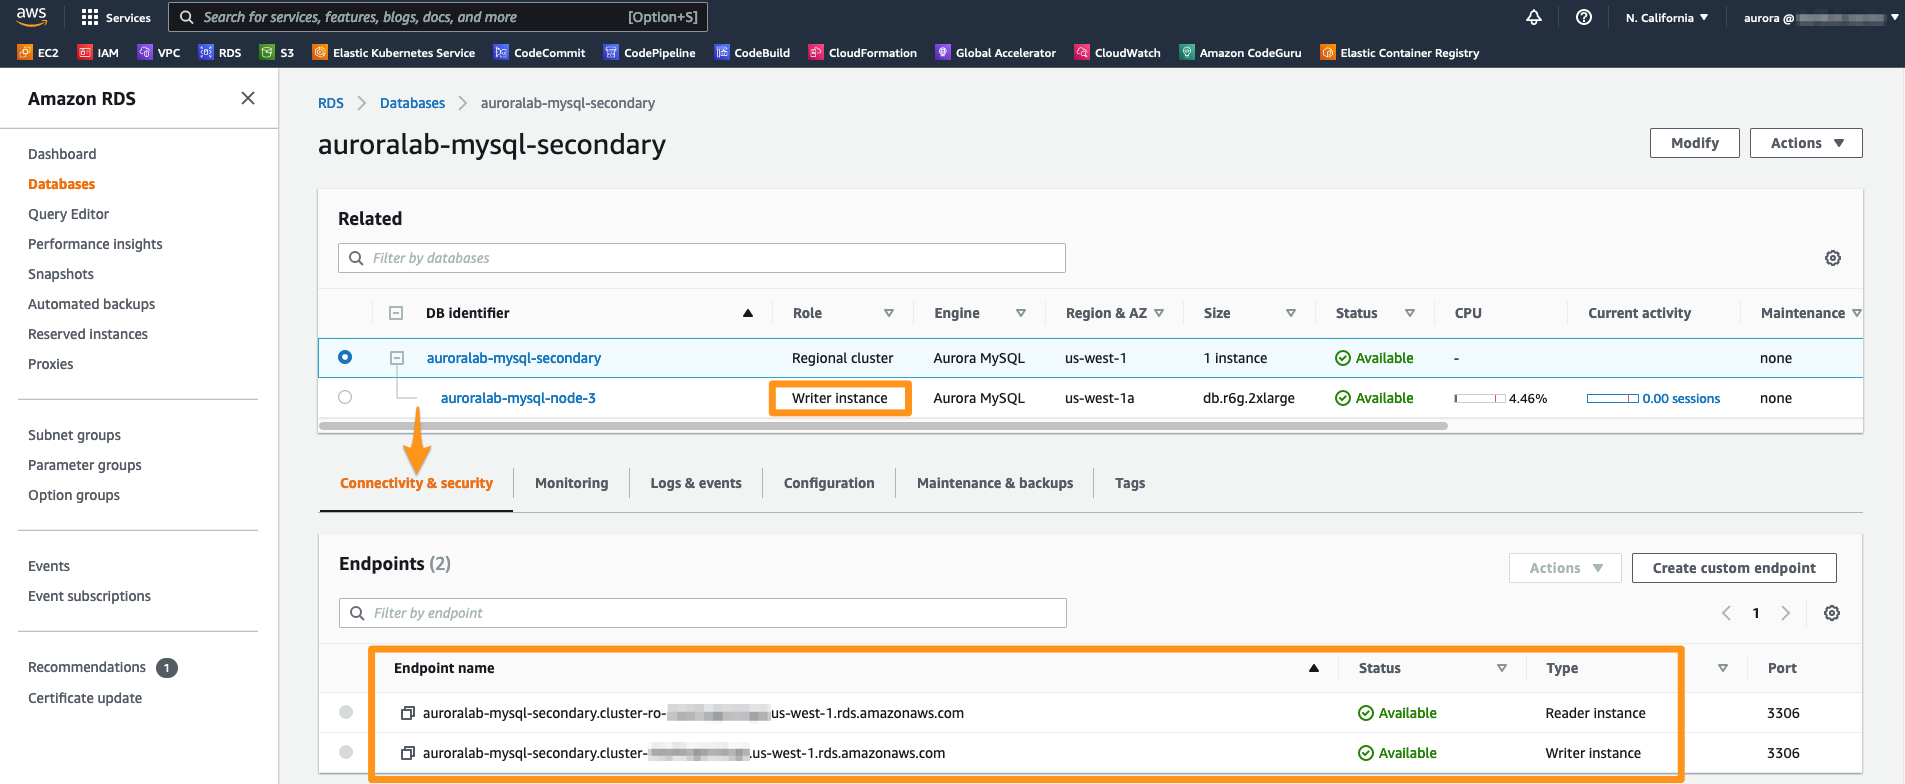
The promotion process should take less than 1 minute. Once it’s complete, you can see that the previously secondary DB cluster is now labeled Regional and the Database instance Role changed to Writer.
Click now at the previously Secondary - and now Primary - cluster. At the tab Connectivity and Security, the Writer endpoint should now be listed as Available. To connect to this endpoint, copy and paste the Endpoint name terminal string into your notepad.
Open now an additional session in Session Manager in the Secondary Region (details at Connect to Session Manager).
Make sure that you’re working on secondary region, especially if you’re following the links above to open the service console.
Once logged in, change to the ec2-user.
sudo su -l ec2-user
Now, you will need to configure the database credentials on the EC2 workstation in the secondary region. Run the following commands, replacing the secretName with the CloudFormation Stack outputs you used to provision the lab environment (in the primary region).
CREDS=`aws secretsmanager get-secret-value --secret-id [secretName] --region us-east-1 | jq -r '.SecretString'`
export DBUSER="`echo $CREDS | jq -r '.username'`"
export DBPASS="`echo $CREDS | jq -r '.password'`"
echo "export DBPASS=\"$DBPASS\"" >> /home/ec2-user/.bashrc
echo "export DBUSER=$DBUSER" >> /home/ec2-user/.bashrc
Run now the command below, replacing the placeholder [NewCluster EndPoint] with the Endpoint Address of the newly promoted DB cluster that you have few steps before:
mysql -h[newClusterEndpoint] -u$DBUSER -p"$DBPASS" mylab
Once connected to the database, let’s query the database items using the Select SQL command below:
SELECT * FROM failovertest1;
Let’s create now a new entry to this table. Copy and paste the following SQL statements and execut them:
INSERT INTO failovertest1 (gen_number, some_text, input_dt)
VALUES (200,"region-2-input",now());
SELECT * FROM mylab.failovertest1;
Congratulations! As you can see, your database can now serve read and write requests at your Secondary Region. Your users and applications can now work normally during an outage that affected the Primary Region.
Removing the resources created by the Labs
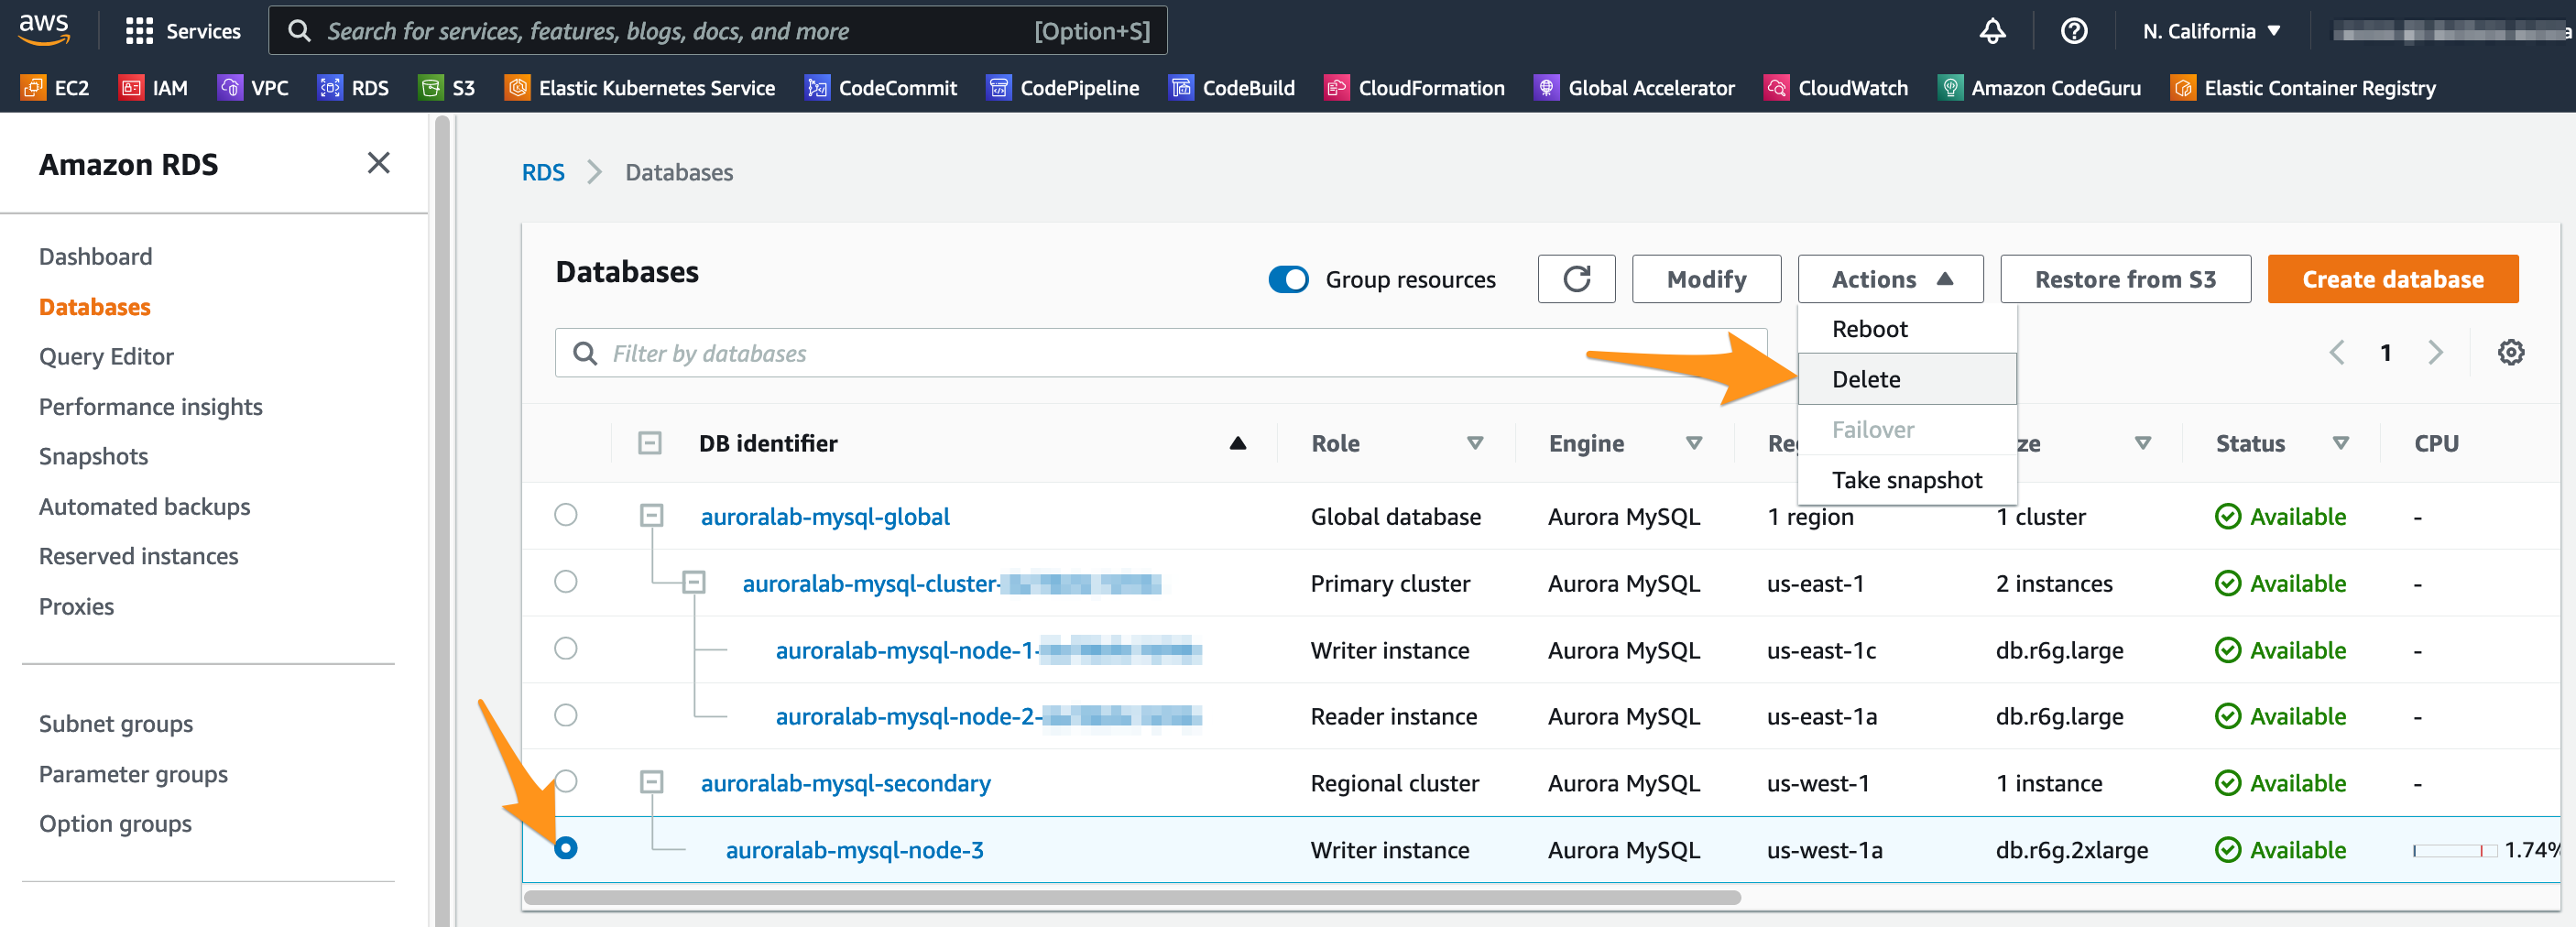
To remove all the resources created during the execution of our lab exercises, first let’s go to the RDS console the Secondary region (us-west-1). Select the writer instance that you removed from the global database and click Delete in the menu.
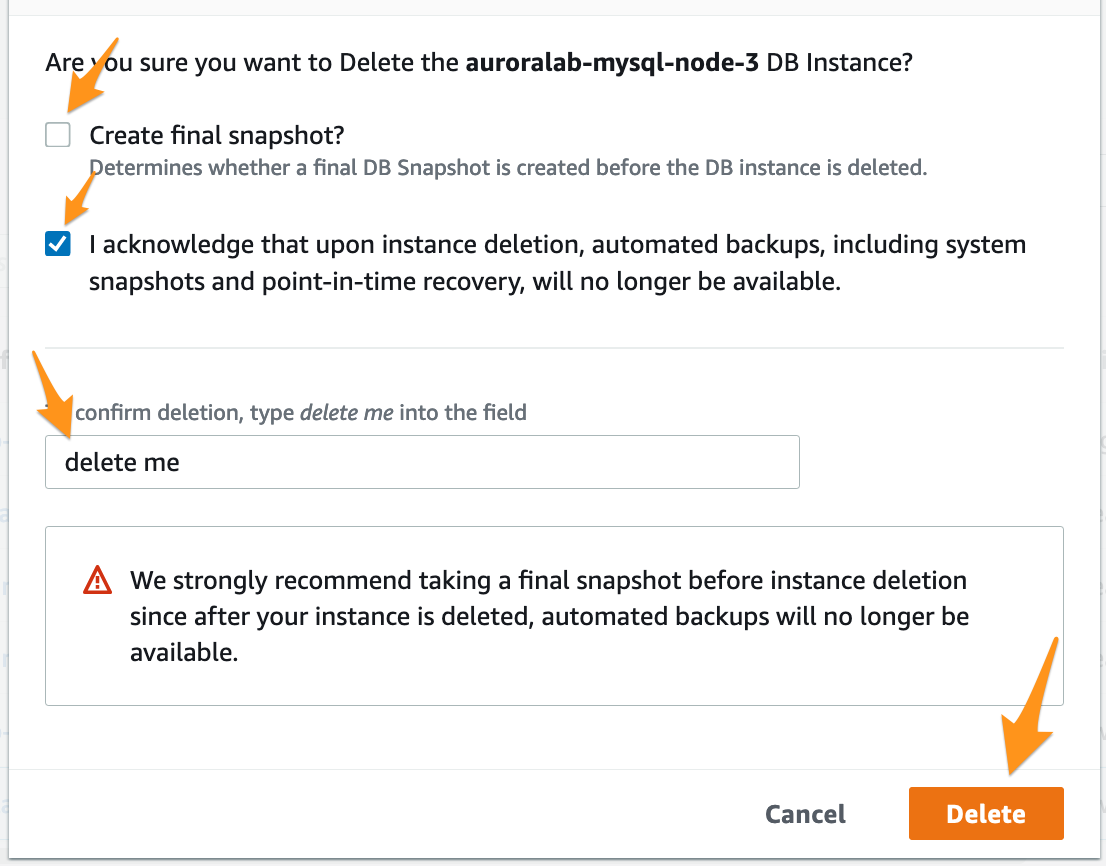
Confirm the deletion by making sure Create final snapshot if not selected and the I acknowledge… is selected. Type delete me into the field and click Delete.
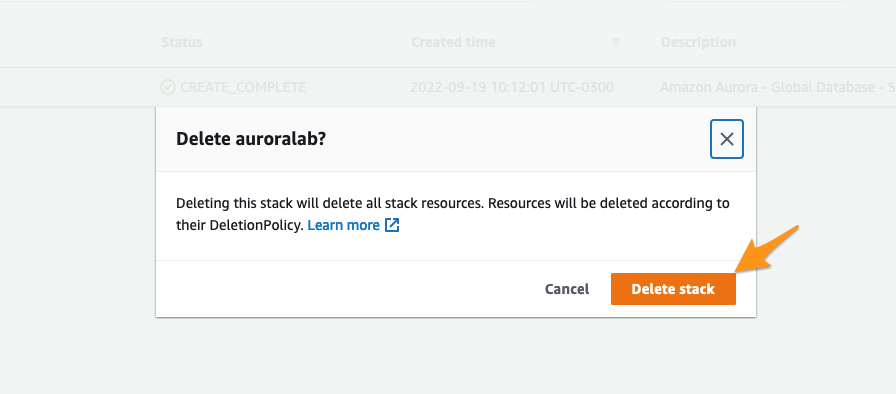
Now, you will be able to go to the CloudFormation console at the Secondary region (us-west-1), select the stack that was created in our labs and remove them by clicking at the Delete button and confirm the removal by selecting Delete stack.
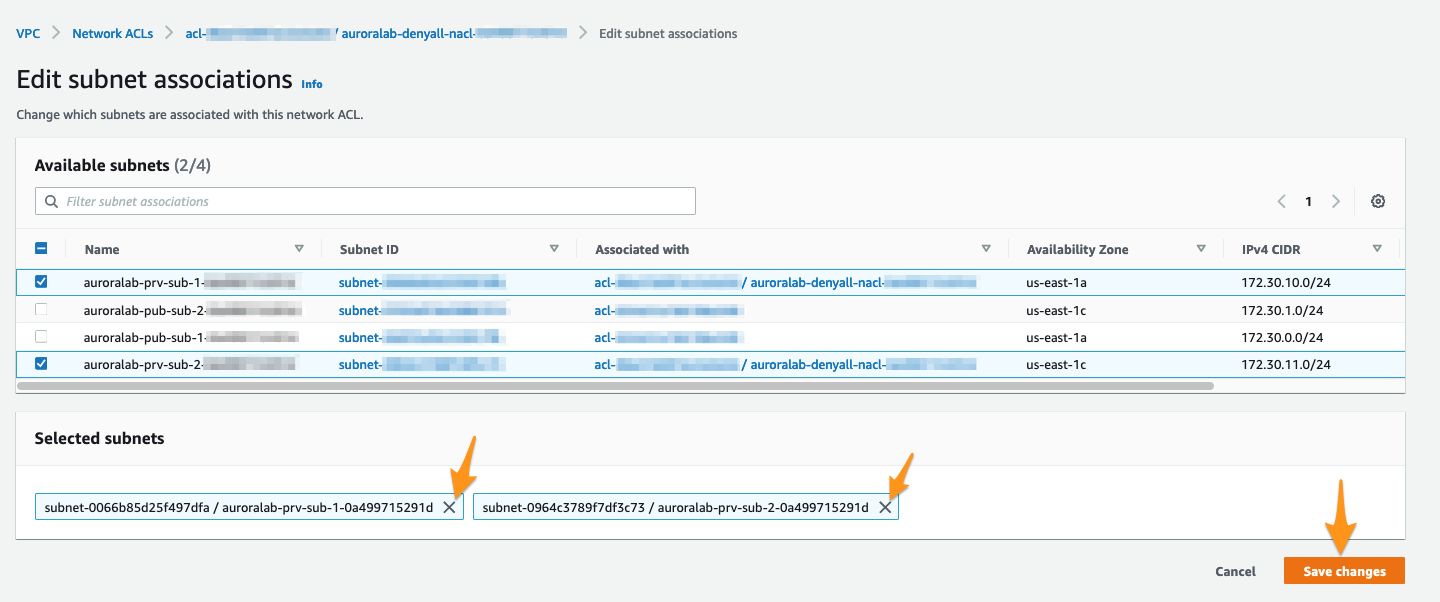
In the Primary region (us-east-1), open the VPC service console and then navigate to the Network ACLs section. You should see the NACL called auroralab-denyall-nacl from earlier. Mark the checkbox in front of the NACL and switch to the Subnet associations tab in the details pane and click on Edit subnet associations. To proceed, remove all subnets from the field Selected subnets. Click at Save changes button to confirm.
Now, finally, you will be able to go to the CloudFormation console at the Primary region (us-east-1), select the stack that was created in our labs and remove them by clicking at the Delete button and confirm the removal by selecting Delete stack.
Conclusion
With this exercise, it was possible to verify how to create an Aurora Global Cluster, monitor the update of cross-region data, and failover across regions.
Source: Amazon Aurora Labs for MySQL