Amazon Aurora - Global Database
Objective
These exercises will show you the steps for using the Global Database engine for Amazon Aurora for MySQL databases. If you want more information click here.
By the end of this exercise, you will be able to:
- Create database clusters
- Monitor replication performance
- Perform cross-region failover operation
Estimated Duration: 2 hours
Approximate Cost: 20 USD
Create an Aurora Global Database
Amazon Aurora Global Database is designed for globally distributed applications, allowing a single Amazon Aurora database to cover multiple AWS Regions. It replicates your data without impact on database performance, enables fast local reads with low latency in each region, and provides disaster recovery from outages in a region.
This lab contains the following tasks:
- Create the Lab Environment
- Create an Aurora Global Cluster
1. Create a lab environment in the N.Virginia Region (us-east-1)
Access AWS Management Console
You can access the console at: https://console.aws.amazon.com/ or through the single sign-on (SSO) mechanism provided by your organization.

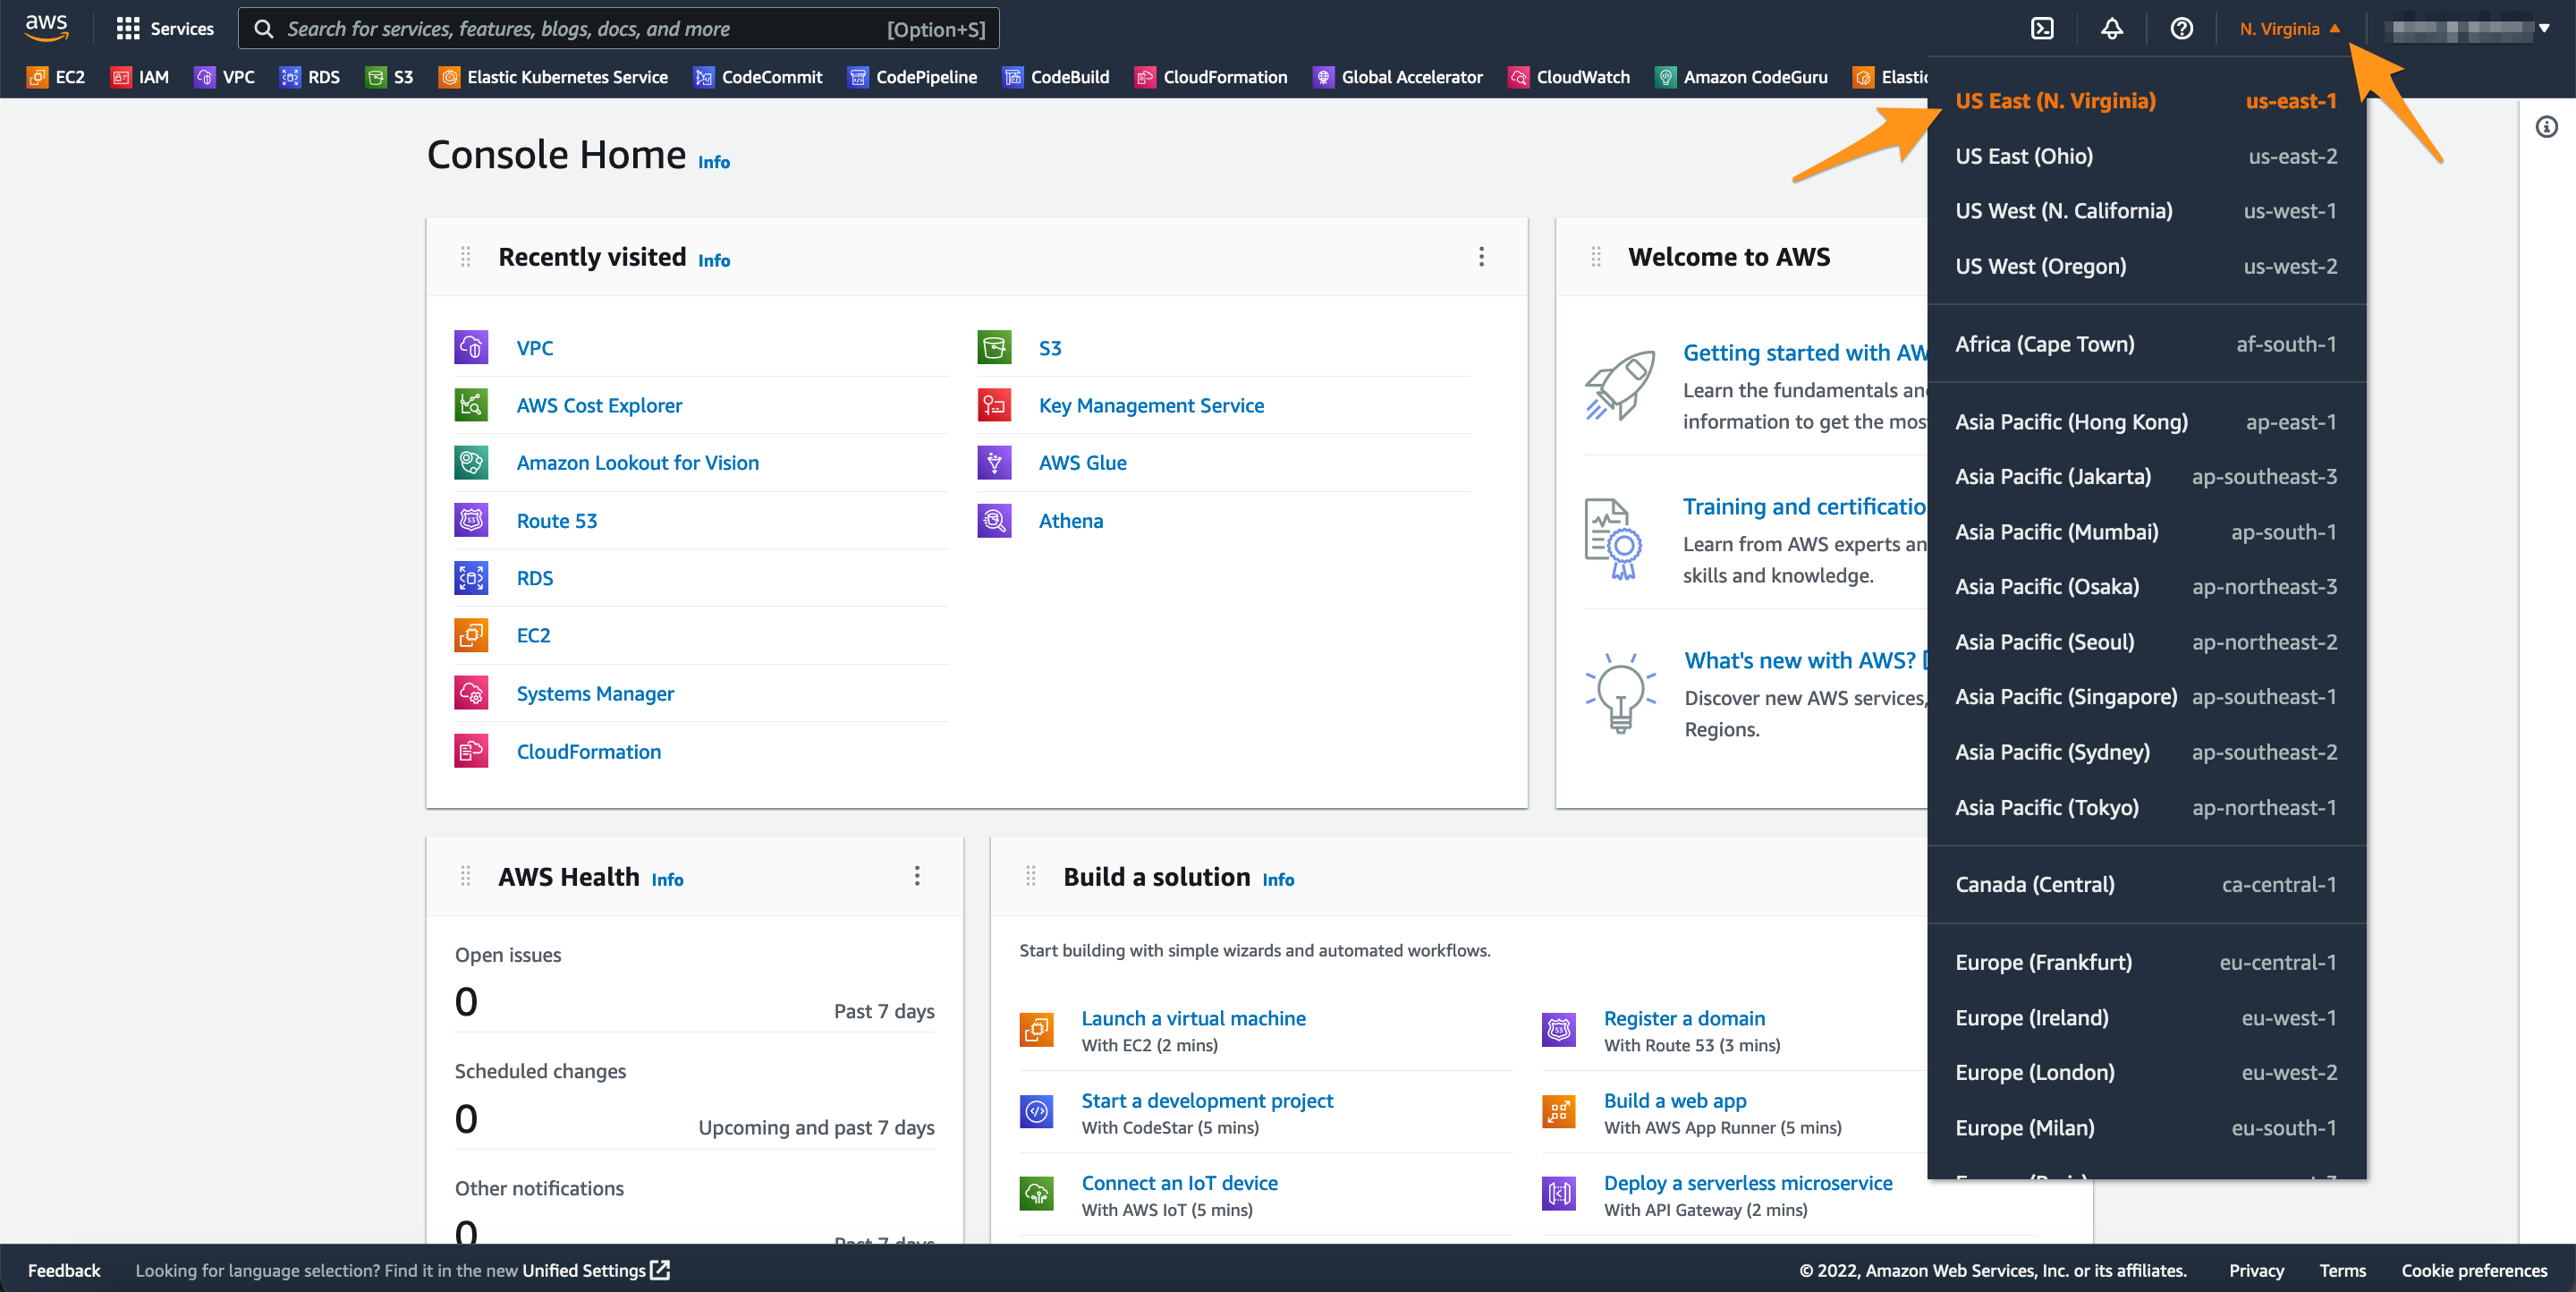
Labs are designed to work in any of the regions where Amazon Aurora compatible MySQL is available. However, not all Amazon Aurora features and capabilities may be available in all currently supported regions.
This lab uses the US East(N. Virginia)/us-east-1 region for the Aurora Global Database primary region and the US West(N.California)/us-west-1 region for the secondary environment. Verify that US East(N. Virginia)/us-east-1 region is selected in the console.
Create the lab environment using AWS CloudFormation
To simplify the initial lab experience, we created basic models for AWS CloudFormation that provision the resources required for the lab environment in both regions. These models are designed to deploy a consistent network infrastructure and components used in the lab.
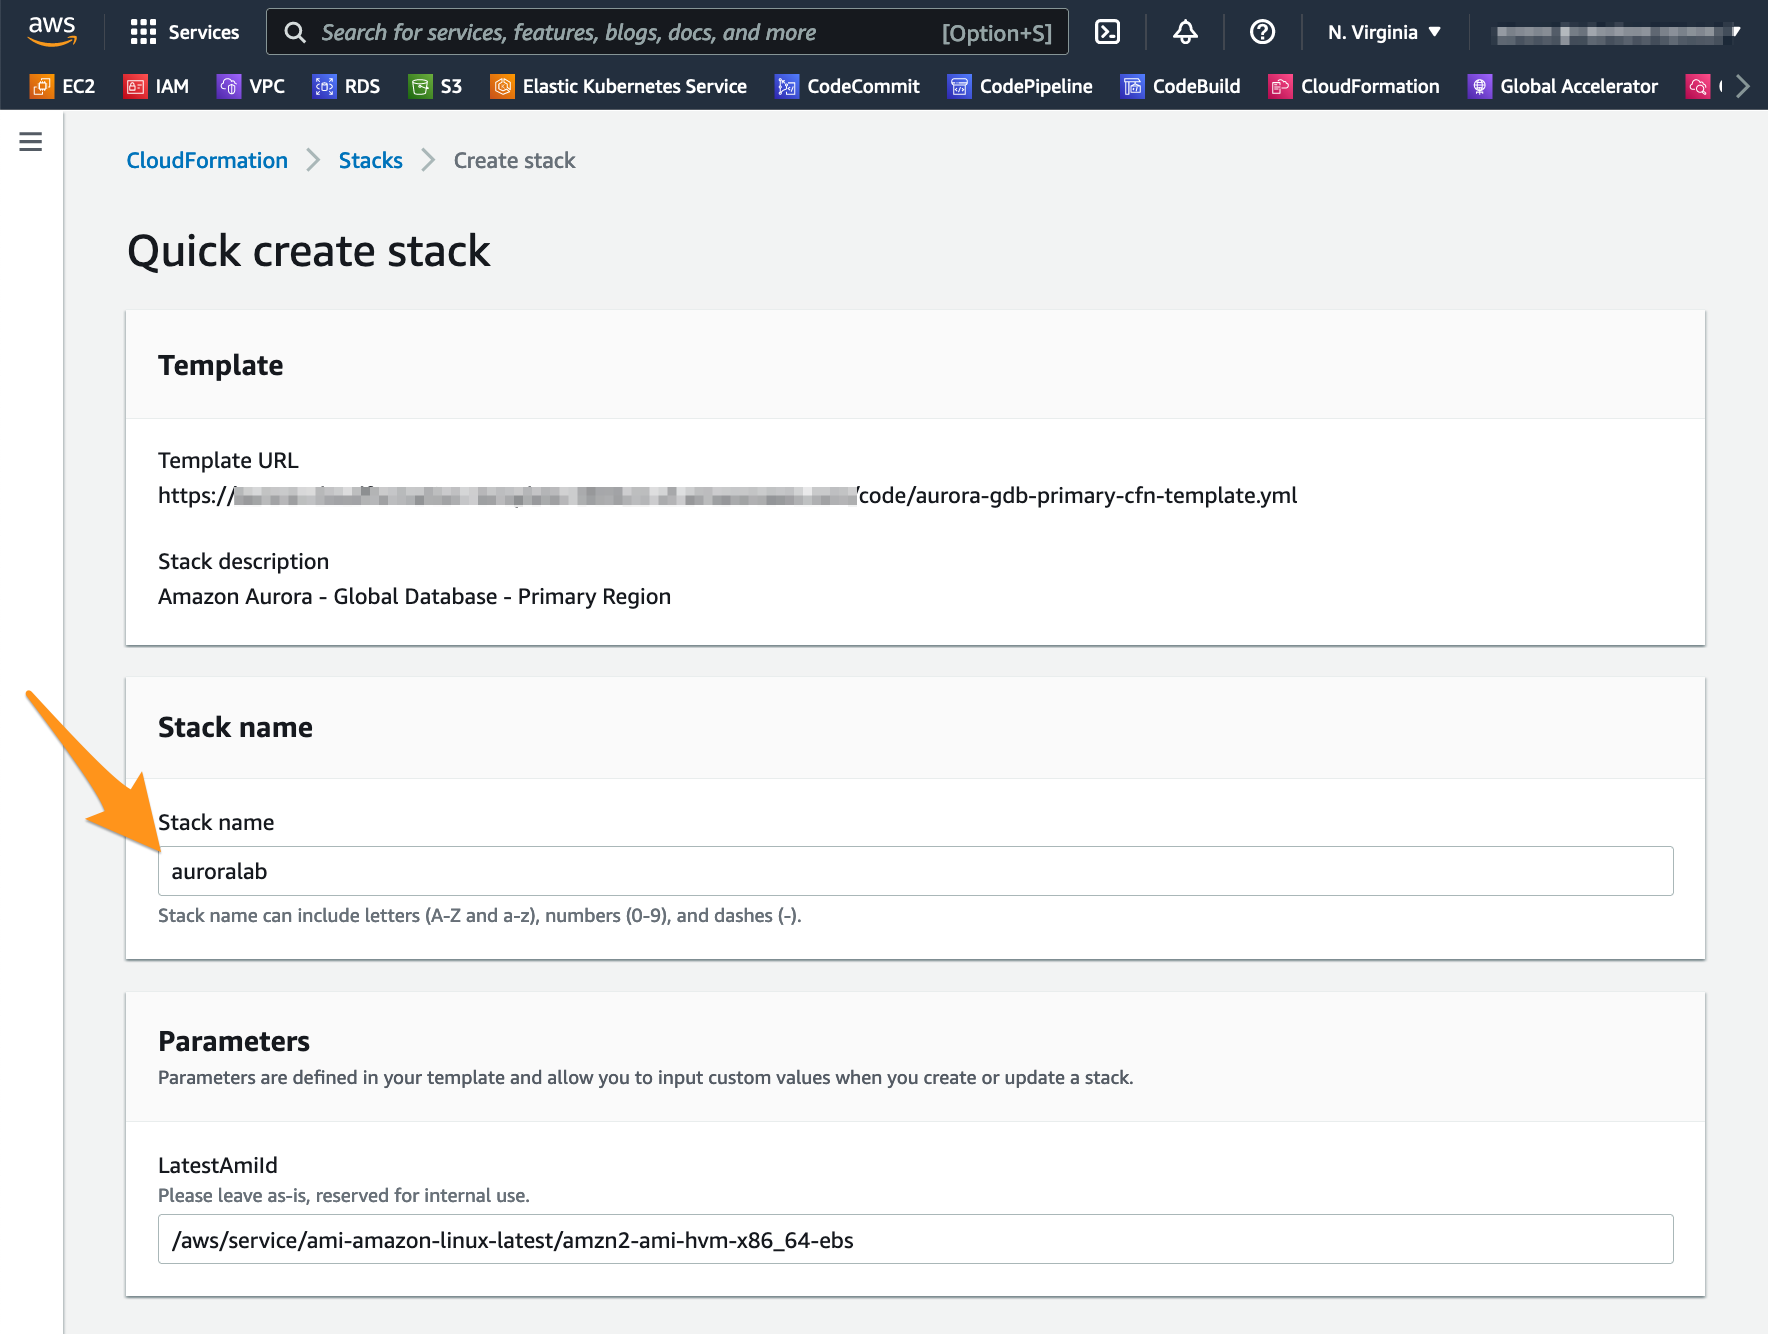
Click Launch Stack to create an Aurora Provisioned DB Cluster in the Primary Region automatically:

In the field called Stack Name, make sure the value auroralab is default.
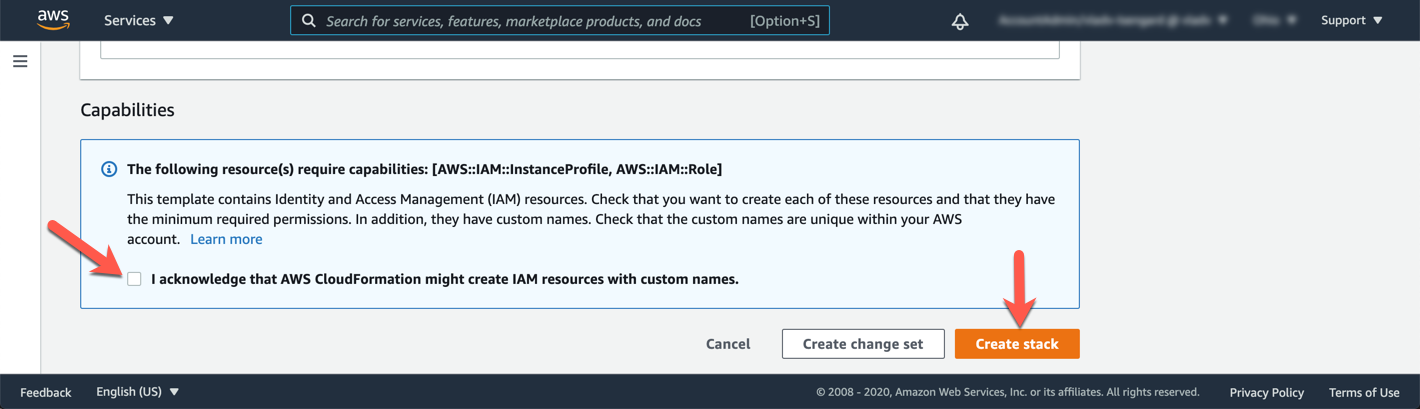
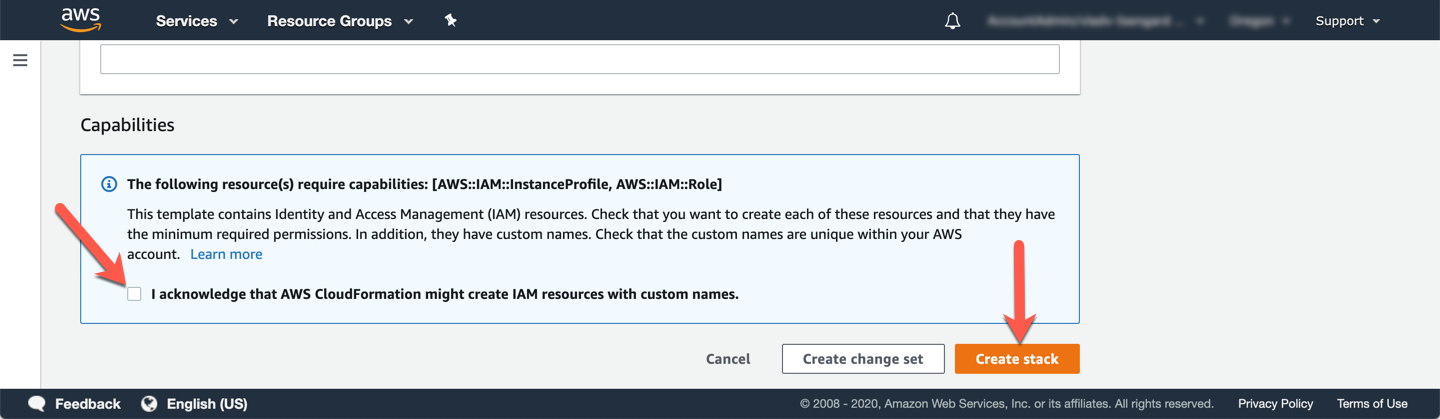
Go to the bottom of the page, check the box that says: I acknowledge that AWS CloudFormation might create IAM resources with custom names and click Create stack.
The stacks will take approximately 20 minutes to provision. You can monitor the status on the page Stack detail. You can monitor the progress of the stacks creation process by updating the tab Events. The last event on the list will indicate CREATE_COMPLETE for the stack feature.
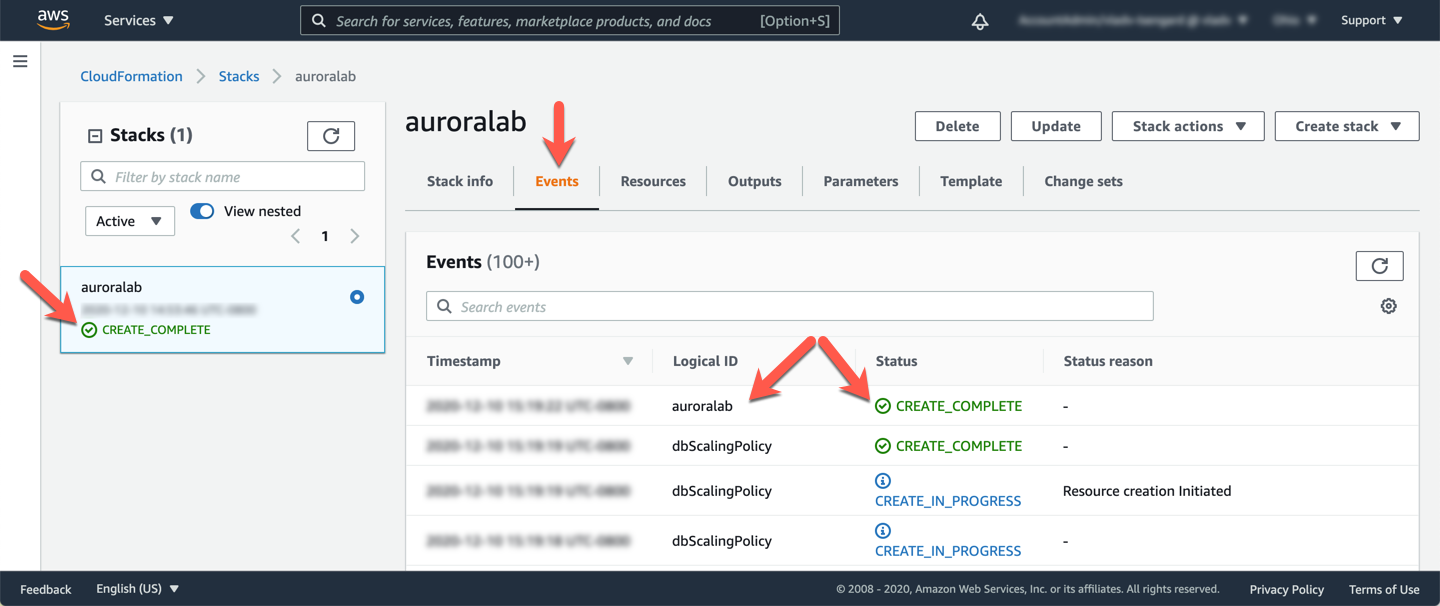
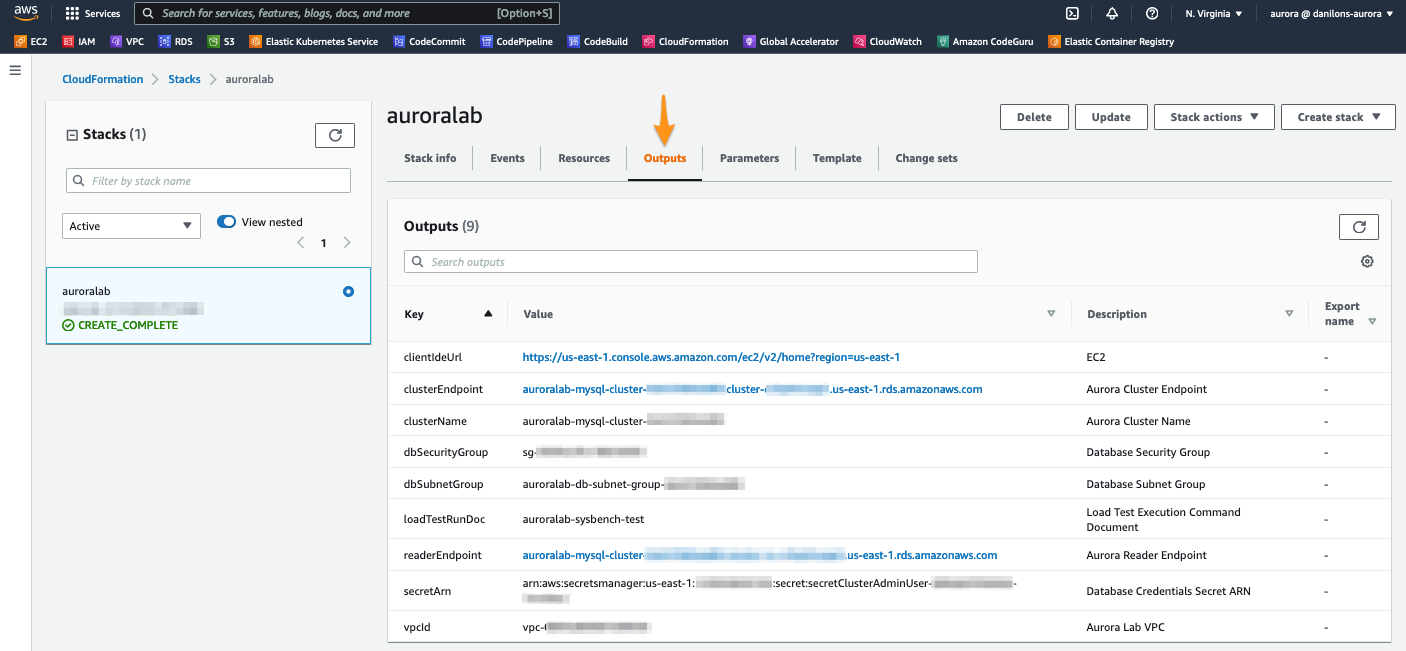
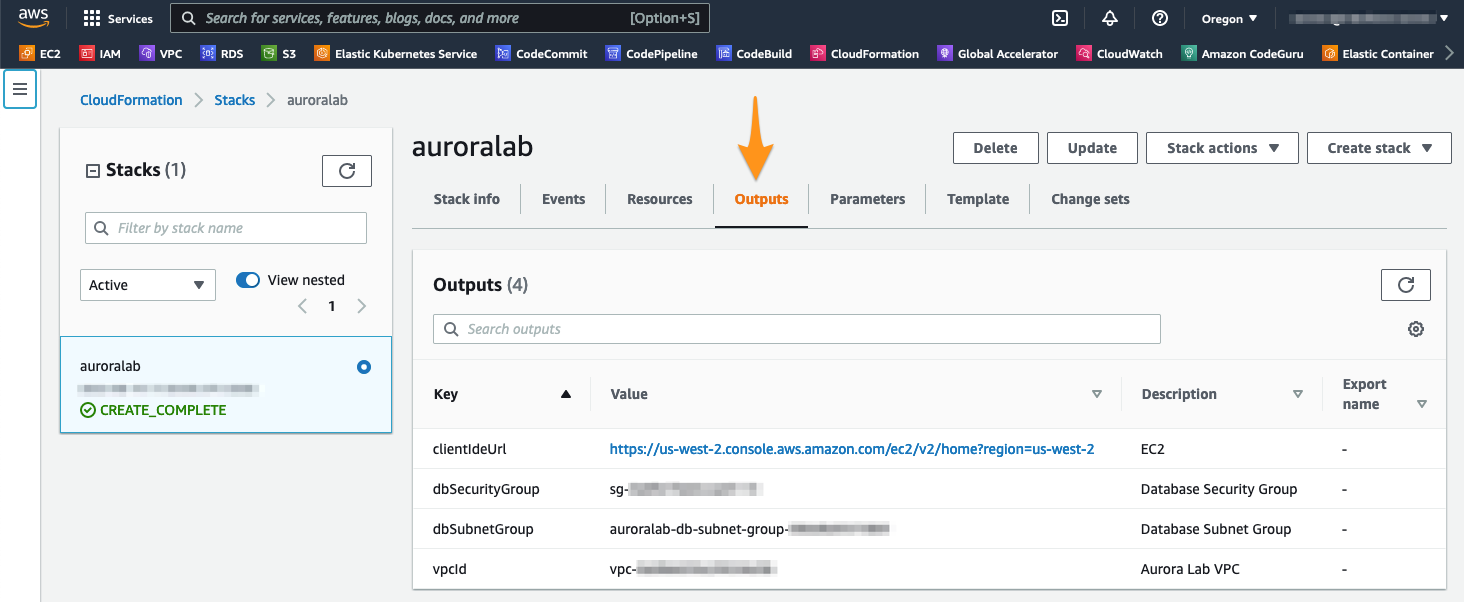
When the status from the stack is CREATE_COMPLETE, click in the tab Outputs. The values from auroralab will be essential for the completion of the rest of the laboratory. Take a moment to save these values in a location where you have easy access to them during the rest of the lab. The names that appear in the column Key are referenced directly in the instructions in subsequent steps, using the parameter format: [OutputKey] .
Now let’s check the access to Session Manager, from where we’ll run some commands in the following labs.
Do not proceed without checking access to Session Manager.
Create a lab environment in the N.California Region (us-west-1)
Using multiple regions:
Due to nature multi-regional from a global database, you will often switch between two regions to perform the tasks of this lab. Be Aware that you are performing the actions in the appropriate region because some of the features created are very similar between the two regions. Let’s refer to the region where your current DB cluster is deployed, and you’ve been working so far, as yours primary region. Let’s refer to the region where you will deploy the secondary and read-only DB cluster as secondary region.
Click Launch Stack below to provision a lab environment in the region US West (N.California), us-west-1 to support the Aurora Global Database.
In the field called Stack Name, make sure the value auroralab is default. Accept all default values for the remaining parameters.
Go to the bottom of the page, check the box that says: I acknowledge that AWS CloudFormation might create IAM resources with custom names and click Create stack.
The stack will take approximately 10 minutes to be provisioned, you can monitor the status on the page Stack detail. You can monitor the progress of the stack creation process by updating the tab Events. The last event on the list will indicate CREATE_COMPLETE for the stack feature.
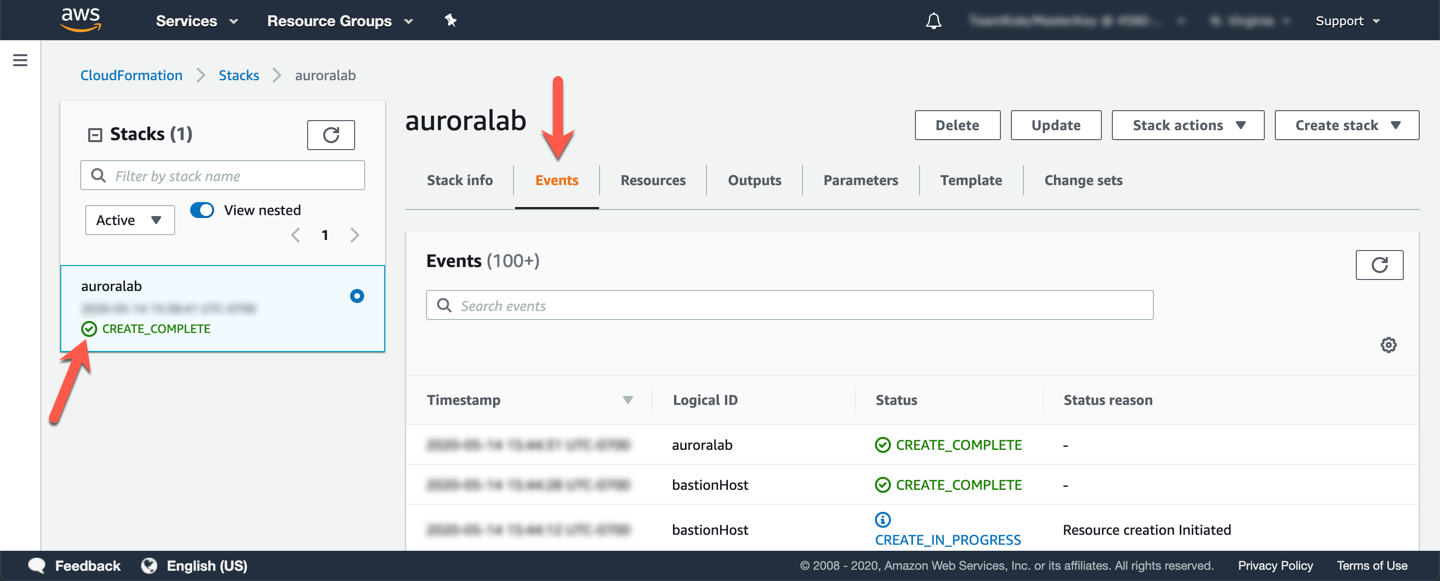
When the stack status is CREATE_COMPLETE, click the tab Outputs. The values here will be essential for the completion of the rest of the laboratory. Take a moment to save these values in a location where you have easy access to them during the rest of the lab. The names that appear in the column Key are referenced directly in the instructions in subsequent steps, using the parameter format: [OutputKey] .
3. Create an Aurora Global Cluster
The lab environment that was automatically provisioned for you already has an Aurora MySQL DB cluster, in which you are running the load generator. You will create a global DB cluster using this existing DB cluster, such as primary.
‘Global Cluster’ vs. ‘DB Cluster’: What’s the Difference?
One DB Cluster exists in just one region. It’s a container for up to 16 database instances that share the same storage volume. This is the traditional configuration of an Aurora cluster. Whether you’re deploying a provisioned, serverless, or multi-master cluster, you’re deploying a DB cluster in a single region.
A global cluster is a container for several database clusters, each located in a different region, which acts as a cohesive database. One global cluster consists of a [DB] primary cluster in a particular region that is capable of accepting writes and up to 5 clusters [DB] secondary which are read-only, each in a different region. Each database cluster in a given global cluster has its own storage volume, but the data is replicated from the primary cluster to each of the secondary clusters asynchronously, using a low-latency, high-throughput replication system developed for this purpose.
Once the lab environments created in the previous steps are finalized, we can continue.
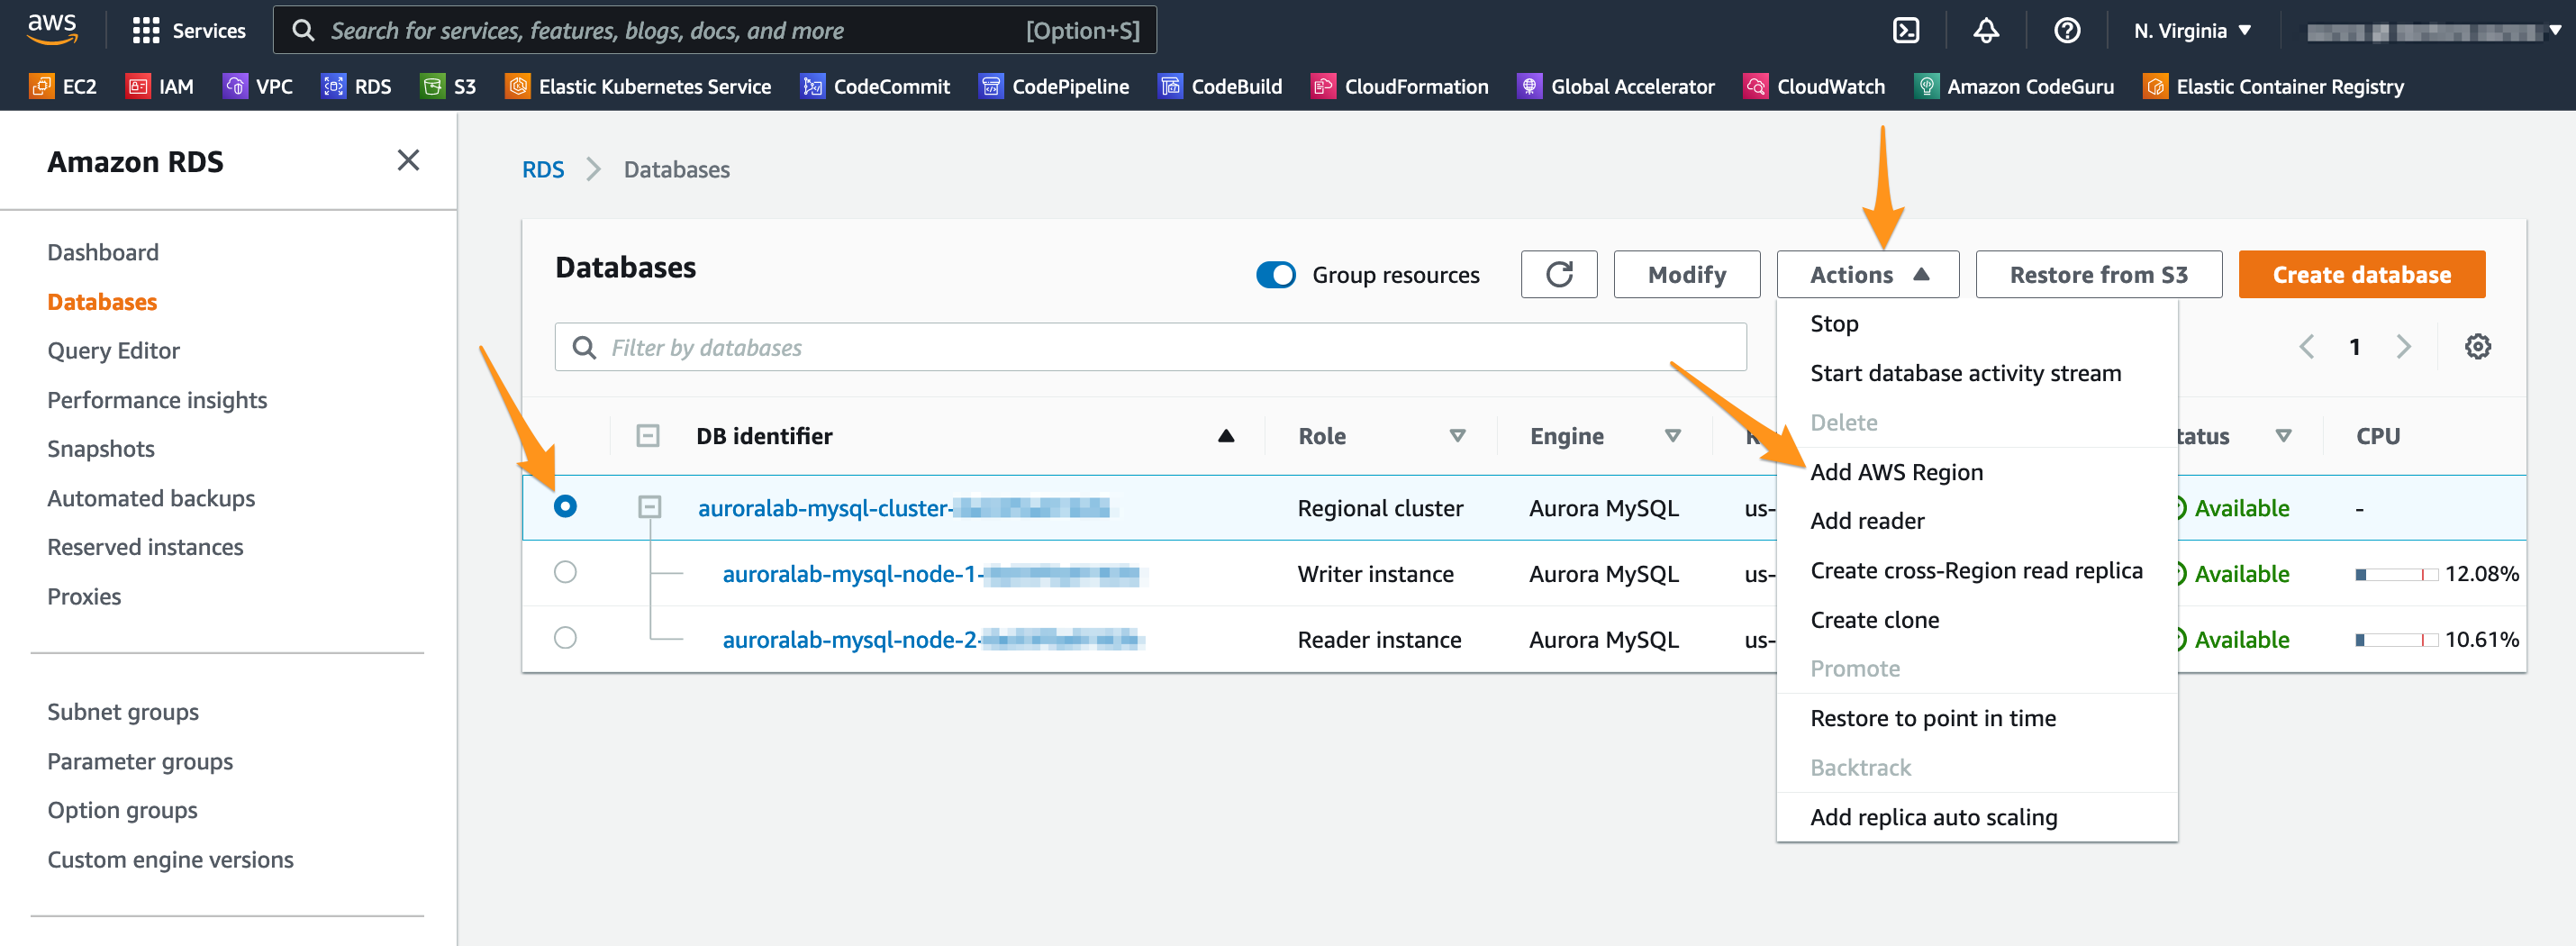
Open the Amazon RDS service console on the MySQL DB cluster details page in the primary region. If you navigated to the RDS console by means other than the link in this paragraph, click auroralab-mysql-cluster in the section Databases from the RDS service console, and make sure you are back in the primary region.
Make sure you’re still working on primary region, especially if you’re following the links above to open the service console on the right screen.
On the drop-down button Actions, choose Add AWS Region.
Set the following options on the configuration screen for the secondary DB cluster:
-
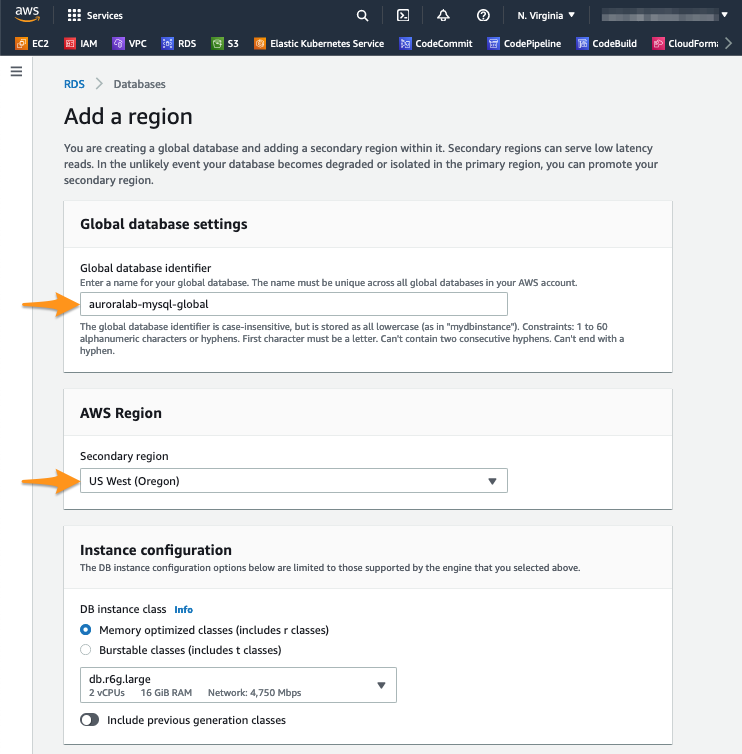
In the section Global database settings:
- In Global database identifier put
auroralab-mysql-global
- In Global database identifier put
-
In the section AWS Region:
- Choose the secondary region from
US West (N.California)
- Choose the secondary region from
-
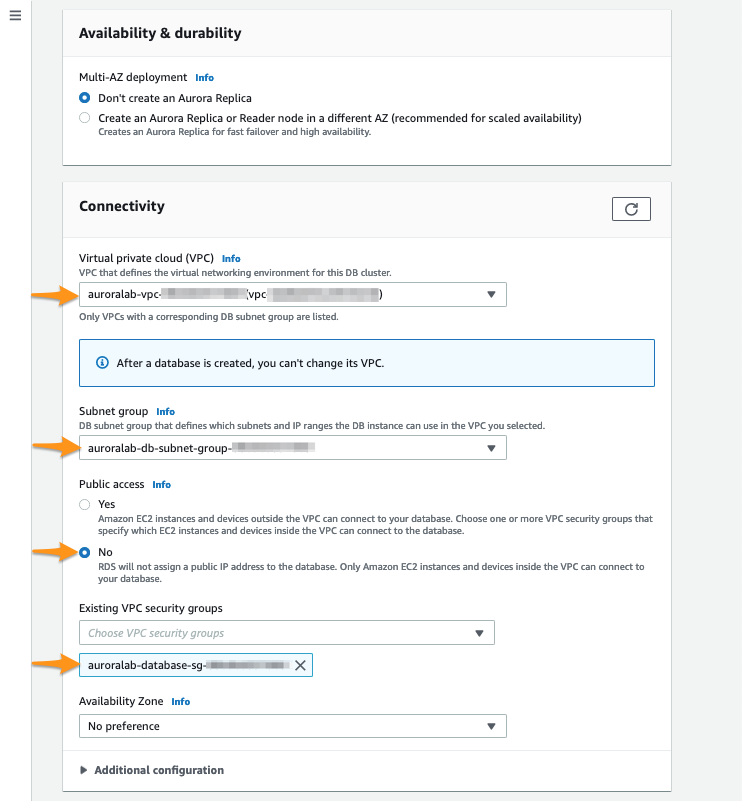
In Connectivity, specify where the DB cluster will be deployed with the network information created above:
- In Virtual Private Cloud (VPC) select
auroralab-vpc- - Make sure the right Subnet Group has been automatically selected, must have the name
auroralab-db-subnet-group. - Make sure the option Public access is set to
No - For VPC security group select Choose existing and choose the security group called
auroralab-database-sg, remove any other security groups, such asdefaultof the selection.
- In Virtual Private Cloud (VPC) select
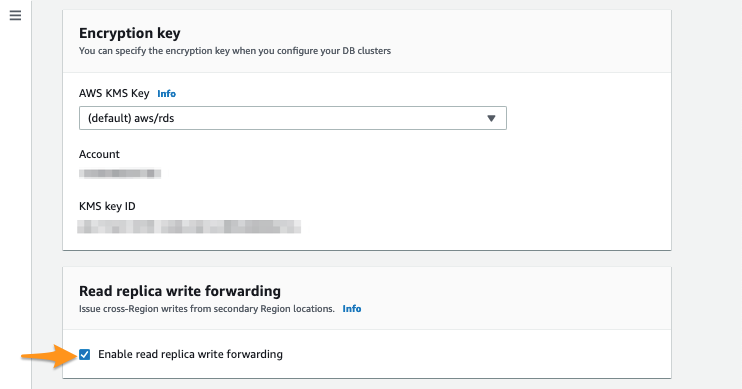
-
In Read replica write forwarding:
- Mark the option Enable read replica write forwarding
-
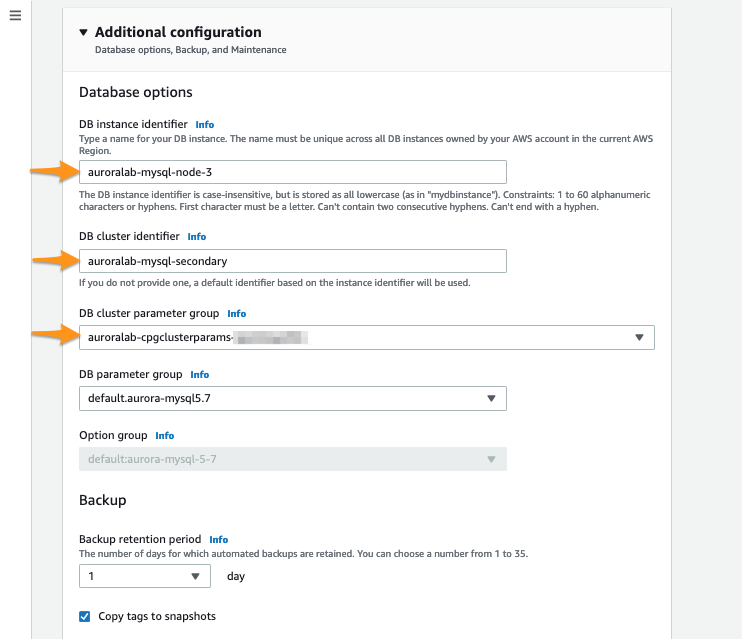
Expand the section Additional configuration, and configure the following options:
- For DB instance identifier choice
auroralab-mysql-node-3 - For DB cluster identifier choice
auroralab-mysql-secondary - For DB cluster parameter group select the group with the name of the stack in the name (e.g.
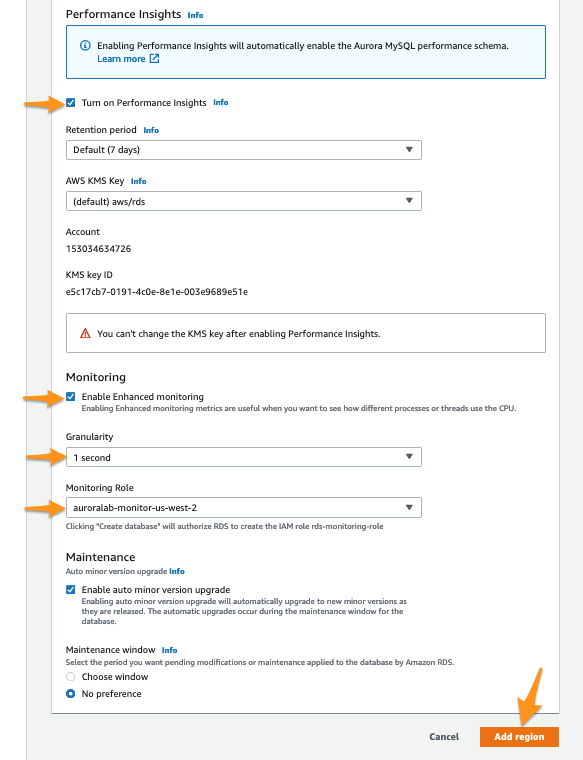
auroralab-[...]) - Make sure the option Turn on Performance Insights is turned on
- For Retention period choice
7 days (free tier) - For Master key choice
[default] aws/rds - Make sure the option Enable Enhanced monitoring is turned on
- For Granularity choice
1 second - For Monitoring Role choice
auroralab-monitor-[secondary-region]
- For DB instance identifier choice
Notice there are two monitoring functions in the list, one for the primary region (one in the upper right corner), the other for the secondary region (normally us-east-1). In this step, you need the region secondary.
What do these options mean?
You will create a global cluster, a secondary DB cluster, and a DB instance in that secondary cluster, in a single step. Your existing DB cluster will become the primary DB cluster in the new global cluster. These are distinct API calls to the RDS service if you create a global cluster using the AWS CLI, SDKs, or other tools. The RDS service console simply combines these distinct steps into a single operation.
Click Add region to create the global cluster.
Creating a global cluster based on the existing DB cluster is a transparent operation, the current cluster will not be disrupted. You can monitor performance metrics throughout this operation.
The global cluster, including the secondary DB cluster, can take up to 30 minutes to provision.
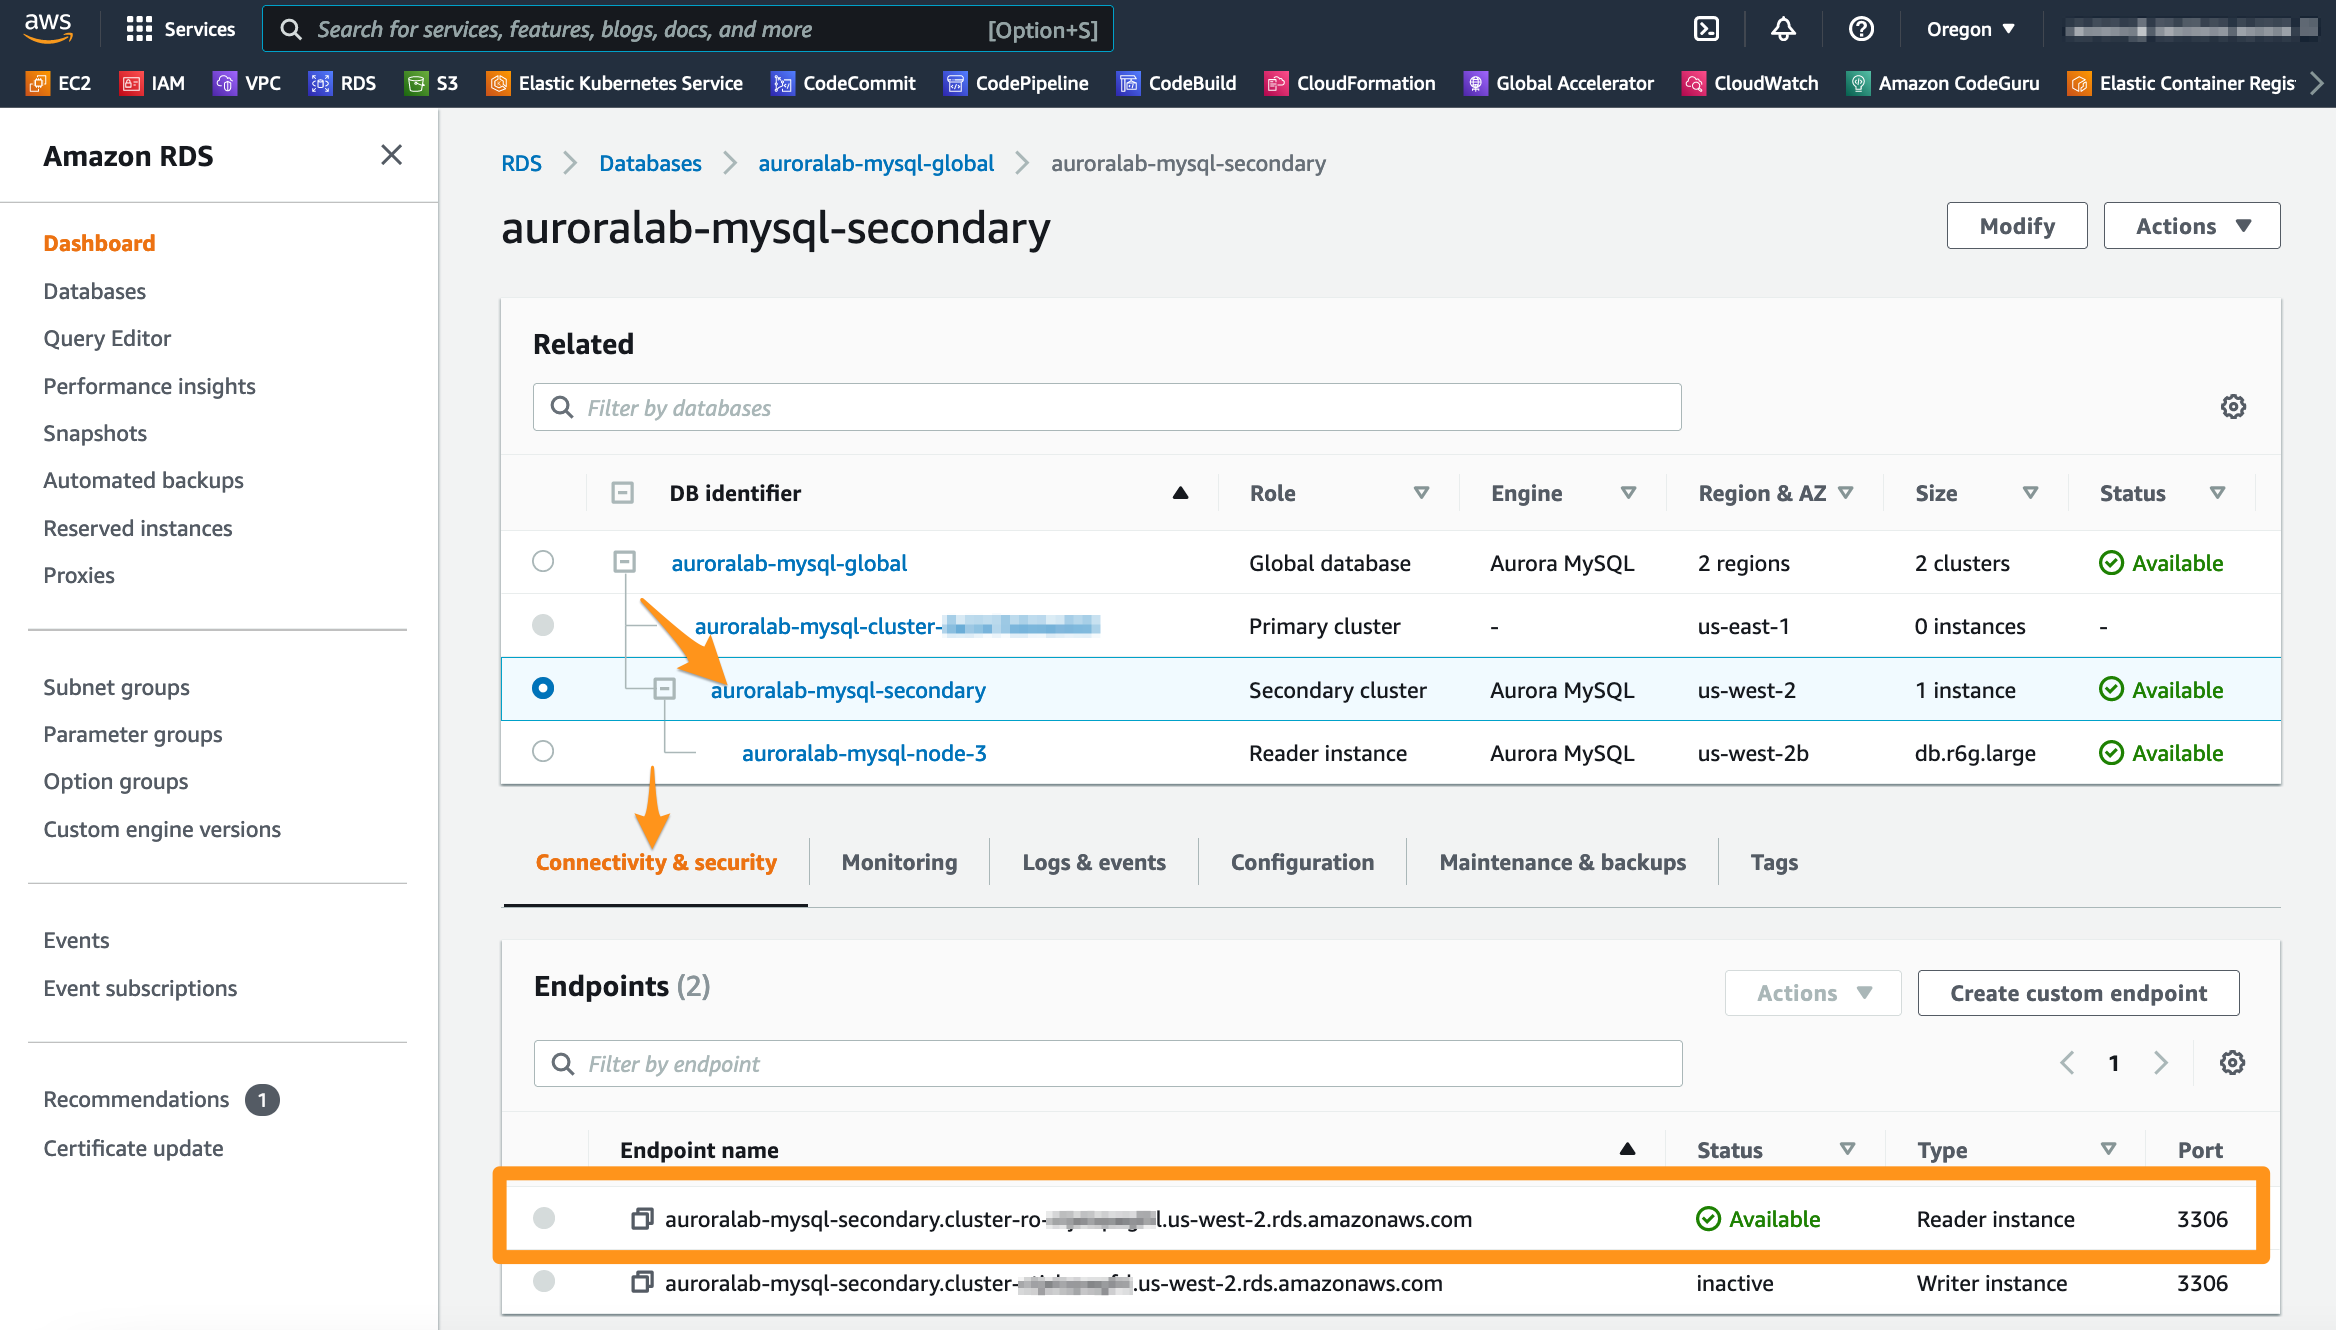
To connect to the secondary DB cluster and start using it, you must retrieve the database cluster access addresses. Unlike a regular DB cluster, only a Reader Endpoint is provisioned. The writer Cluster Endpoint is not created because secondary database clusters contain only readers and cannot accept writes. The Reader Endpoint will always resolve for one of the secondary DB cluster instances and should be used for low-latency read operations in that region. In the RDS console, go to the secondary DB cluster details view by clicking on the auroralab-mysql-secondary link.
The Endpoints section on the Connectivity and security tab of the details page displays the endpoints.